Photography Tips for Beginners with Phone: A Complete Guide to Start Capturing Stunning Photos
September 4, 2025
Budget Travel Hacks for Families in 2025: Smart Ways to Explore More and Spend Less
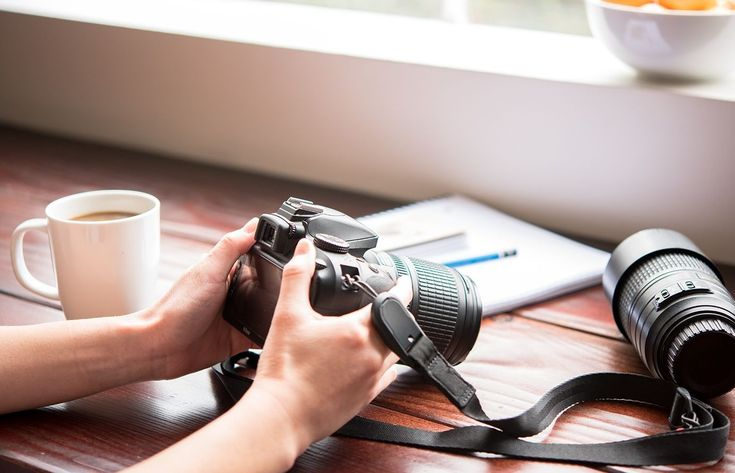
September 4, 2025Photography is no longer limited to fancy studios or expensive equipment. Thanks to smartphones, affordable cameras, and some creativity, you can now capture professional-looking photos right at home. Whether you want stunning portraits for social media, product photography for your small business, or simply beautiful memories with your family, you don’t need to spend a fortune to get quality results.In this guide, we’ll break down how to take professional photos at home using simple techniques, budget-friendly tools, and creative tricks that anyone can master.
Why Home Photography Is Worth Trying
Taking professional photos at home saves you time, money, and effort. You don’t need to hire a photographer every time you need updated pictures for your Instagram, blog, or online store. Instead, you can create high-quality images whenever inspiration strikes.
Some additional benefits include:
- Convenience: No traveling to studios or outdoor locations.
- Creative control: You choose the background, lighting, and props.
- Practice: The more you experiment, the better your photography skills get.
- Budget-friendly: Use natural light and simple props without costly studio gear.
Step 1: Choose the Right Equipment
Many people believe professional photos require expensive cameras, but that’s not true. Even a good smartphone can capture incredible shots if you know how to use it.
Options to Consider:
- Smartphone Cameras: Modern phones come with portrait modes, HDR, and AI tools that make photos look professional.
- DSLR or Mirrorless Cameras: Great for those who want more control over settings like aperture and shutter speed.
- Tripod: Essential for stability, especially in low light. Even a budget tripod can drastically improve photo quality.
- Self-Timer or Remote Shutter: Helps when taking photos of yourself without blurriness.
Step 2: Find the Best Lighting
Lighting is the most important factor in photography. At home, natural light works wonders.
- Window Light: A large window can act like a softbox, giving you flattering, even light. Stand facing the window or at a slight angle for natural portraits.
- Golden Hour: If you have access to a balcony, rooftop, or backyard, use the golden hour (shortly after sunrise or before sunset) for warm, professional-looking light.
- DIY Lighting: If natural light isn’t enough, you can use affordable ring lights or even desk lamps with white covers to diffuse harsh light.
Pro Tip: Avoid strong overhead lights that create unflattering shadows. Instead, aim for soft, diffused light.
Step 3: Set Up Your Background
The background can make or break a photo. A cluttered room will distract from your subject, while a clean and creative background can elevate your image.
Simple Home Background Ideas:
- Plain white or colored wall.
- Bedsheet or curtain draped smoothly.
- Bookshelves for a cozy aesthetic.
- Plants for a natural vibe.
- Wooden table for food or product photography.
If you’re photographing products, try using foam boards or chart paper for a clean, professional look.
Step 4: Work on Composition
Composition is how you arrange elements in your photo. Mastering this skill will instantly make your photos look professional.
- Rule of Thirds: Imagine dividing your frame into 9 equal boxes. Place the subject along the lines or intersections for balanced photos.
- Leading Lines: Use hallways, staircases, or furniture edges to draw attention to your subject.
- Symmetry: Center your subject for a powerful, professional feel.
- Negative Space: Leave empty areas around the subject to make it stand out.
Step 5: Master Posing and Angles
When photographing people (including yourself), posture and angles matter a lot.
- Relaxed Shoulders: Avoid stiffness. Natural poses look more appealing.
- Experiment with Angles: Take photos slightly above eye level for flattering portraits.
- Candid Shots: Sometimes looking away from the camera creates more natural results.
- Use Props: A coffee mug, book, or plant can make your photos feel storytelling and less staged.
For products, take photos from multiple angles—top-down for flat lays, close-ups for details, and side angles for perspective.
Step 6: Edit Like a Professional
Editing is the secret ingredient behind professional-looking photos. Luckily, you don’t need expensive software anymore.
Editing Apps to Try:
- Snapseed: Free, easy, and beginner-friendly.
- Lightroom Mobile: Professional controls with presets.
- VSCO: Great filters and film-like effects.
- Canva: Perfect for adding text and layouts for social media.
Focus on:
- Adjusting brightness and contrast.
- Fixing colors and tones.
- Sharpening details.
- Cropping and straightening for balance.
Step 7: Practice, Experiment, and Have Fun
Photography is an art, and no guide is complete without practice. The best part of taking photos at home is the freedom to experiment without pressure.
Try different lighting setups, angles, and editing styles until you discover what works for you. Don’t be afraid to break rules—sometimes the best shots come from unexpected experiments.
Quick Checklist for Professional Photos at Home
| Step | What to Do | Tools Needed |
|---|---|---|
| Equipment | Use smartphone or camera, tripod for stability | Phone/camera, tripod |
| Lighting | Use natural window light or affordable ring light | Window, lamps, ring light |
| Background | Keep it clean and simple or use props creatively | Wall, sheet, plants |
| Composition | Apply rule of thirds, symmetry, leading lines | Camera/phone |
| Posing & Angles | Experiment with positions and props | Creativity |
| Editing | Use free apps to enhance brightness, colors, and sharpness | Snapseed, Lightroom |
Conclusion
Learning how to take professional photos at home doesn’t require fancy studios or huge investments. All you need is a bit of creativity, the right lighting, simple props, and some editing skills. With consistent practice, your photos will start looking like they came straight out of a professional studio—without leaving your living room.
So grab your phone or camera today, set up a corner with good light, and start experimenting. You’ll be amazed at how much you can achieve from the comfort of your own home.
FAQs
1. Can I take professional-looking photos with just my phone?
Yes! Modern smartphones have excellent cameras. With good lighting and editing, you can achieve results that look professional without a DSLR.
2. What’s the best time of day to take photos indoors?
The best time is during the day when natural light enters your home. Morning and late afternoon usually provide the softest and most flattering light.
3. Do I need expensive lighting equipment for home photography?
Not at all. Natural window light works great. If you want extra support, affordable ring lights or desk lamps with covers can help.
4. How do I avoid blurry photos at home?
Use a tripod or place your camera on a stable surface. Also, make sure your hands are steady, and increase your camera’s shutter speed if possible.
5. How can I make my background look professional without props?
Even a clean, plain wall can work beautifully. If you don’t have props, use bedsheets or curtains to create a simple backdrop.